Owners of previous Nexus devices have enjoyed the ability to directly connect to USB flash drives and other peripherals using USB OTG (On The Go). The online help manual for the Nexus 4 originally said it would also have this feature, until Google removed it, instead suggesting the use of Bluetooth accessories. Many speculated about why this happened, and wondered if this was a hardware limitation or simply something missing from the software.
Thanks to the proof of concept by
CaptainMuon and the subsequent work of
ziddey at XDA Developers, we now have a clearer picture of exactly what went wrong with the Nexus 4's OTG capabilities, as well a working solution for those still wanting connectivity to things like thumb drives, mice, and keyboards.
This is no simple app install - root is required, as well as modifying your phone's software. No hardware modifications to the phone itself are needed, but you will need a special cable, which can be purchased or built at home. Ready to jump in? Hit the break for the complete guide.
Background
The first problem with getting OTG working on the Nexus 4 is that the kernel does not support it. This has been solved using a modified version of
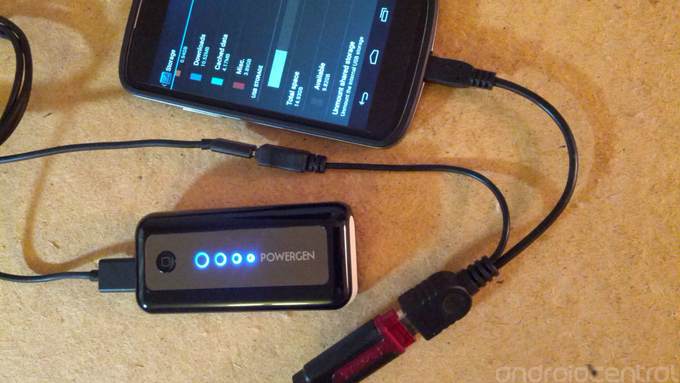
Franco's kernel. The second problem is that the Nexus 4 cannot physically supply the necessary 5 volts. The way around this is to use a Y-cable, and supply the needed voltage from an outside power source such as a wall outlet or external battery pack. Some users have also reported success using a powered USB hub.
Part 1 - preparing the software
To solve the software problem, you'll need to root your Nexus 4 if you haven't already done so. Make sure you're on a deodexed ROM - I'm using
CyanogenMod's 10.1
M2 release. Once you're set up, head over to
ziddey's thread and download his zip file (found at the bottom of the first post; "ziddey-otg-03192013.zip" is the latest as of this writing), which you'll flash in your
custom recovery. This zip contains the the modified kernel, framework, and system files needed to make OTG work.
Part 2 - preparing the hardware
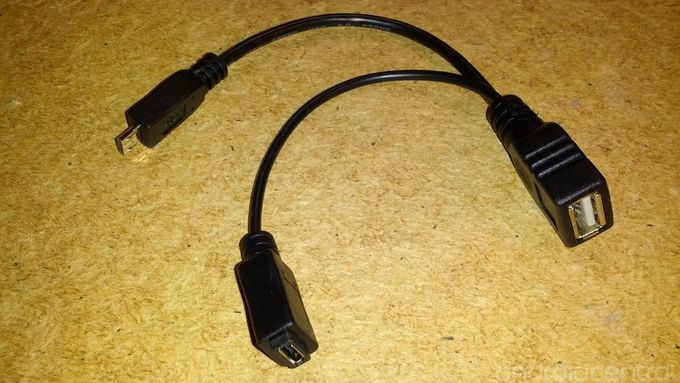
To solve the hardware problem, you'll need a special cable. I chose to purchase an
OTG Y-Cable. If you have the tools and extra parts, you could also
build your own. Whichever you choose, make sure your cable has a male micro-USB and female micro-USB leading into a female USB as pictured above. The portion of the cable that data is transferred through is the male micro-USB to female USB, with the female micro-USB supplying the extra juice.
Getting everything connected
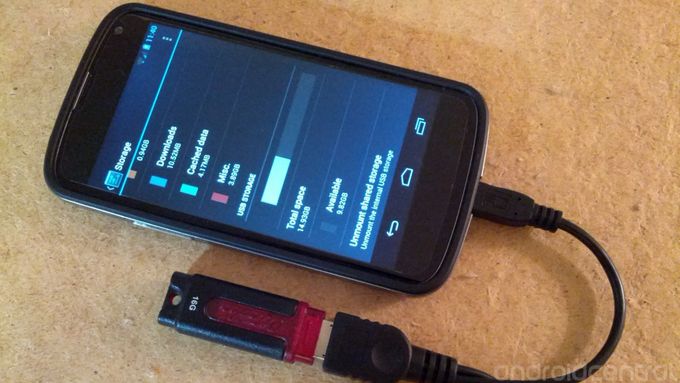
Once you have your cable, you can connect the components. I've mounted my 16 GB thumb drive to my Nexus 4, and attached an external battery pack that provides an output of 5 volts. If you don't have a battery pack and don't need to be mobile, using a wall outlet for power works just as well.
The modified interface
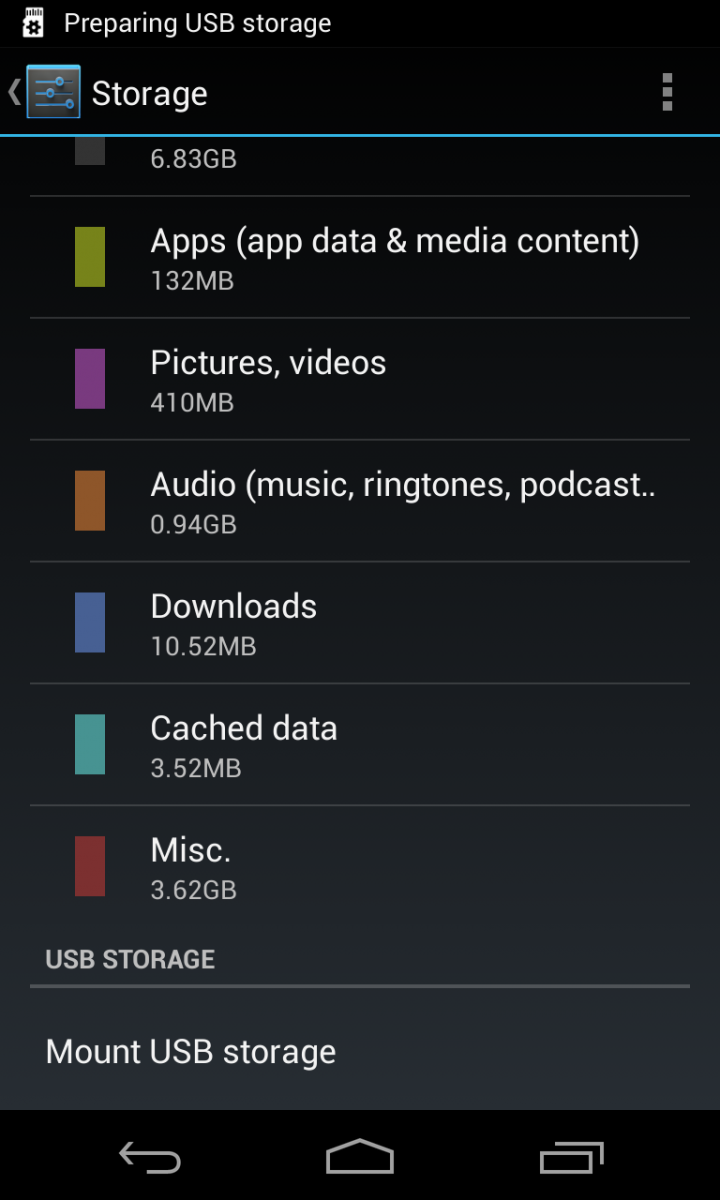
Thanks to ziddey's modified framework, no additional app is needed to mount USB storage. Just go into Settings and then Storage, and tap "Mount USB Storage".
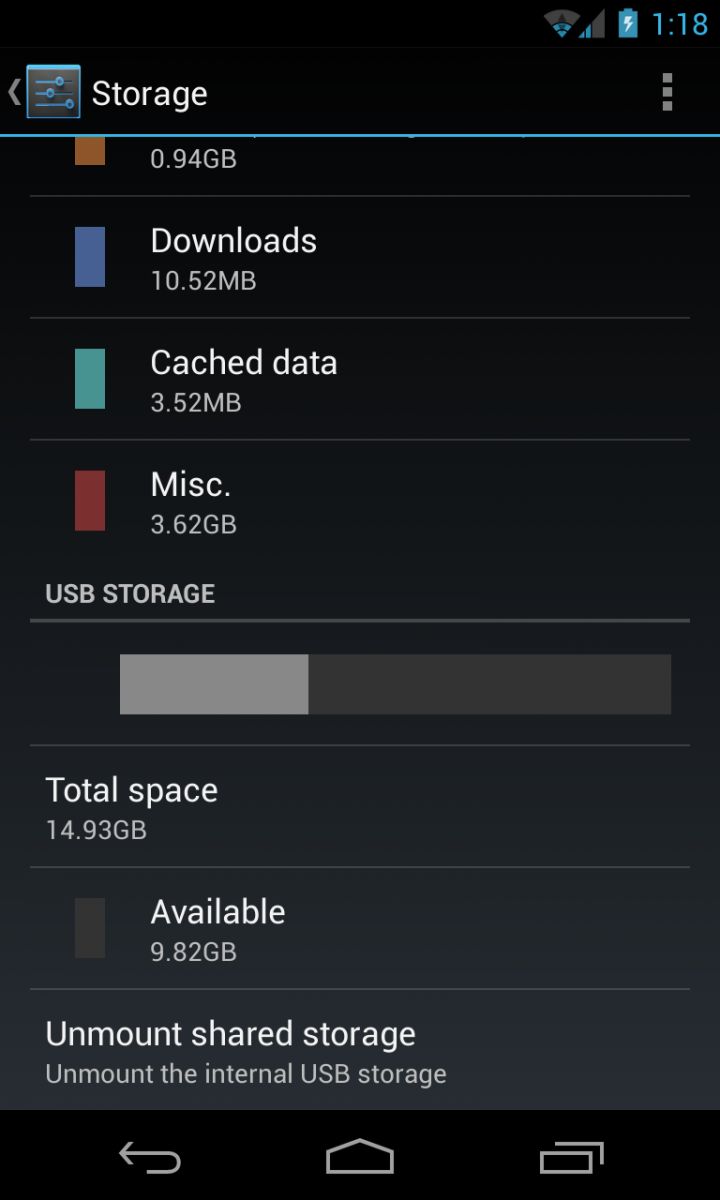
Once mounted, you can see how much total space your drive has as well as how much free space is available. Make sure to tap "Unmount shared storage" before disconnecting your drive to avoid corrupting any files.
Working with external storage
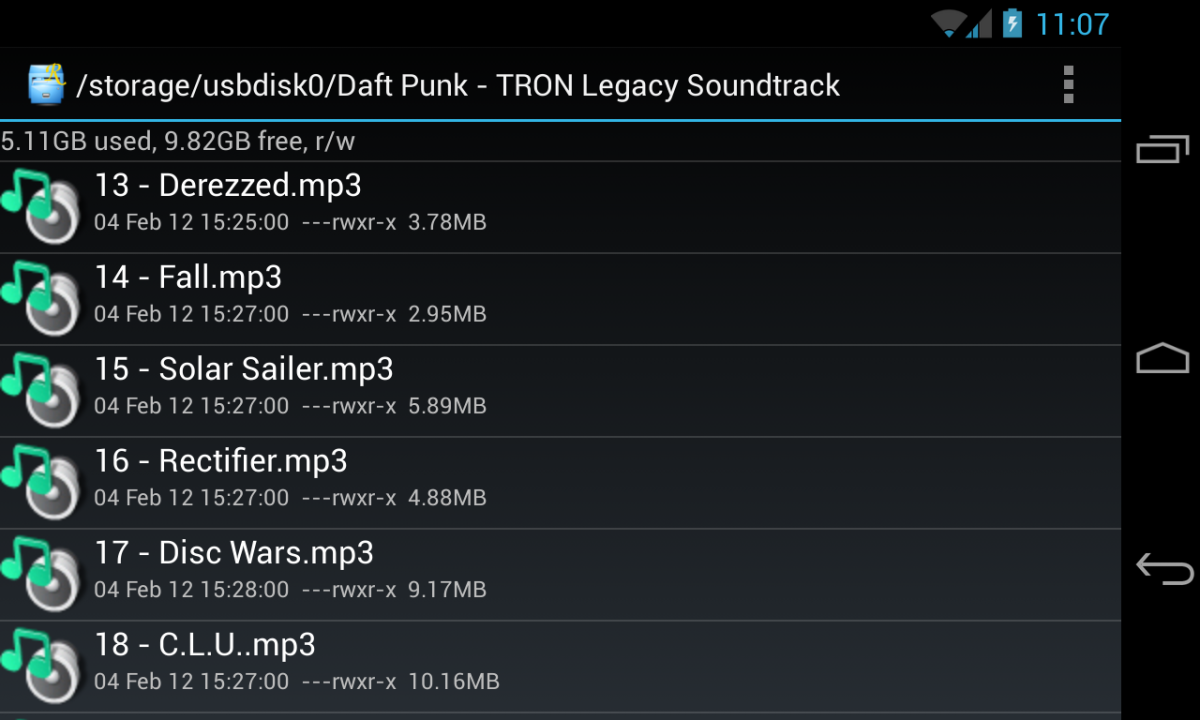
To access the files on your USB drive, use your favorite file manager to navigate to "/storage/usbdisk0/". Everything on your USB drive will be accessible as if it were on your phone's internal storage.
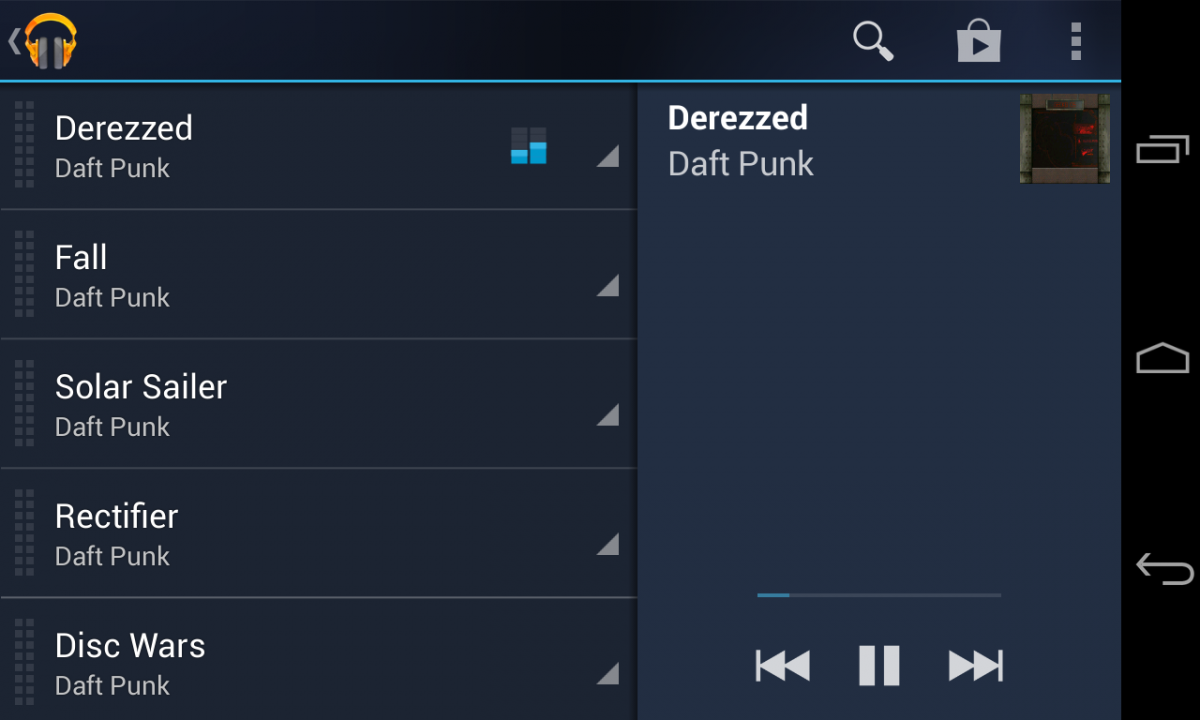
When you connect a USB drive, your media library will automatically be rescanned. This means if you have any movies or music on the drive, they will immediately show up in your media player, and can be played without having to copy them to your phone.
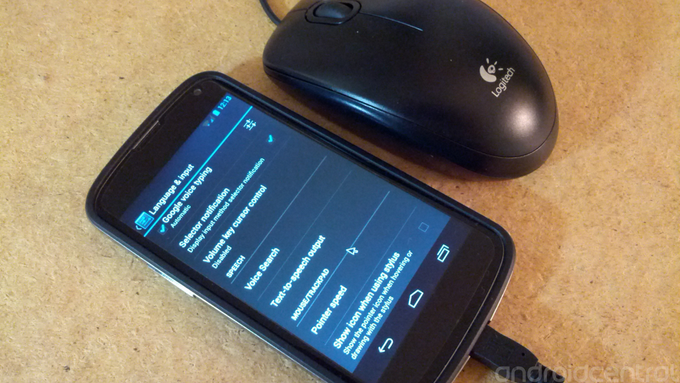
USB accessories
Thumb drives are great, but peripherals are where the fun's at. Here I've connected my $5 laser mouse in place of the USB drive. Notice the extra settings that appear under Language & Input. A mouse pointer is great to have if you need more precision than what touch input can provide.
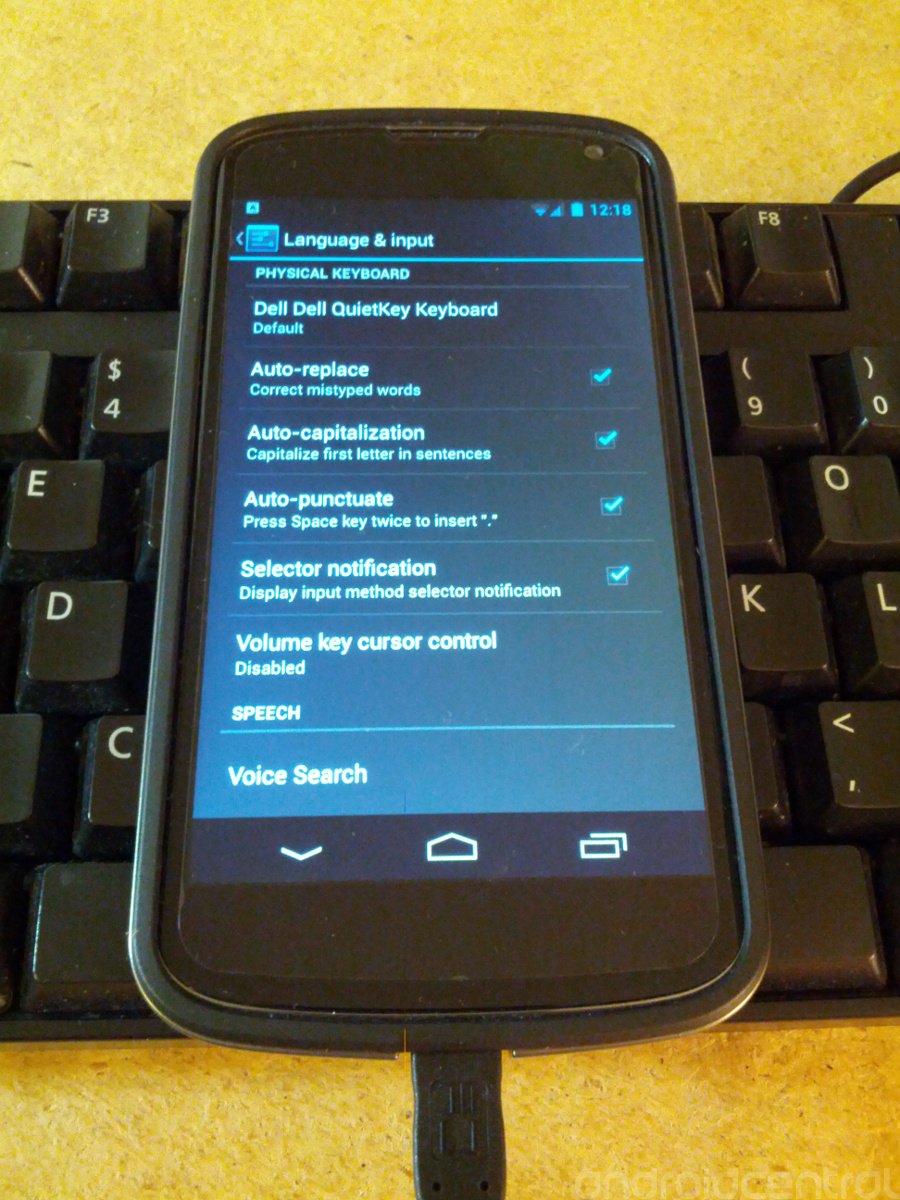
Full sized keyboards work great too. Connecting one will also give you some extra settings, as well as a notification as long as you have it plugged in. I never considered the possibility of writing a novel on my phone, but it's nice to know if my laptop ever gets stolen it won't slow my Word docs down.
The wrap-up
So far ziddey has done an amazing job with the usability of this mod. I've yet to come across anything that would prevent daily usage. The phone charges fine, USB works great, and I've yet to see any force closes or instability. One minor annoyance with the current version of this mod is a notification you get after unmounting USB storage; the only way to clear it is to reboot the phone. Also, I've yet to get my Dualshock 3 controller working, but my mouse and keyboard work flawlessly.
It's still relatively early in the development of the Nexus 4's USB OTG capabilities. In just over a month, we've seen this project go from proof of concept to fully functional modification. It's too bad the Nexus 4 did not come with OTG working out of the box, but if the recent progress is any indication, we might have a factory quality solution in the near future.